Print Graph
File> Print Graph...
![]() Shortcut Key:- Ctrl+P
Shortcut Key:- Ctrl+P
This is another important function in Galaincha Software which helps you to print the graph of the active design in corresponding rows and columns.
Printing graph is very important in carpet manufacturing process and necessary for weaving process. The design will be printed into graph with details of every single knot.

Print Graph Window
A. Printer Settings B. Graph C. Grid D. Size E. Definition Box F. Print Graph G. Print Outlines H. Graph Preview
- Printer Settings: You can select the desired printer in printer settings. By clicking on Change button you can change the current paper size, source and orientation of default printer.
- Graph: Customization of graph output.
- Black Outline: You can specify whether you want the black outline of the design to be printed thick, normal or none.
- Color Number: You can specify the style of color number to be in numeric, alphabets, alphanumeric or no numbering.
- Color Print Type: You can specify the graph output to be full color, color outline or no color (only outline).
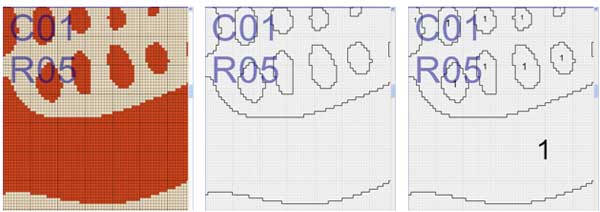
Full color graph(left), black outline without color number(middle), black outline with color number(right)
- Grid: You can specify whether and how you want grid lines for the design.
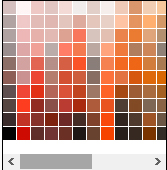
- Grid Color: Set custom color of the grid
- Grid Format: You can set the thickness of grid as normal grid, solid (hard) grid, room only or no grid (turn off grid)
- Knots and lines: per room can be customized for printing graph.
- Size: Customization of Graph printing size
- Margins: You can specify the margins of the paper for printing Bottom, Left, Right, Top.
- Room Size: Specify the size of the room (default 1inch Width and 1inch Height).
- Total Size: Shows the actual size (Width and Height) of the Carpet or Graph.
- Unit: You can change the unit into cm or inch as required.
- Definition Box: Display the brief description of the active selected Graph Settings.
- Show Page Number: Check on the box will enable the page number in each page of the graph.
- Start Printing from Bottom: Selecting this option will enable the graph to be printed starting from the bottom of the design (Default printing starts from the top)
- Print Graph: Click on Print Graph button if you are printing graph for hand-knotting purpose.
- You can print graph directly from your printer connected or Save design graphs in PDF format without the need of an external PDF writer
- Print Graph has options to print design in different given scales
- Current scale (no changes)
- 1:20 (20% smaller than normal)
- 1:10 (20% smaller than normal)
- 1:5 (20% smaller than normal)
- Fit to single page (whole design in a single page) Please visit the instruction page on Printing Design : Different scales
- Print Outlines: Click on Print Outlines button to print graph outlines (Without grids) for tufting purpose.
- Graph Preview: One cell of the grid is equivalent to one page of the printout. If you click on a cell only the selected blue page will be printed. You can select any page by clicking on the cell or multiple pages by dragging. If you want to select all cells for print then press Control +A (Select All). Click on a blue cell to deselect it, so that it won't be printed. Right clicking on a cell will zoom the preview of the graph.
Selecting/Zooming cell
- To Select Cells, Ctrl + left click mouse button or drag along the required Cells. Please note that only the selected cells gets printed.
- If you have to print all pages then you can select all cells by pressing Ctrl+A.
- Right-click on particular Cells will zoom the view.
![]() Watch video tutorial on Print Graph
Watch video tutorial on Print Graph